
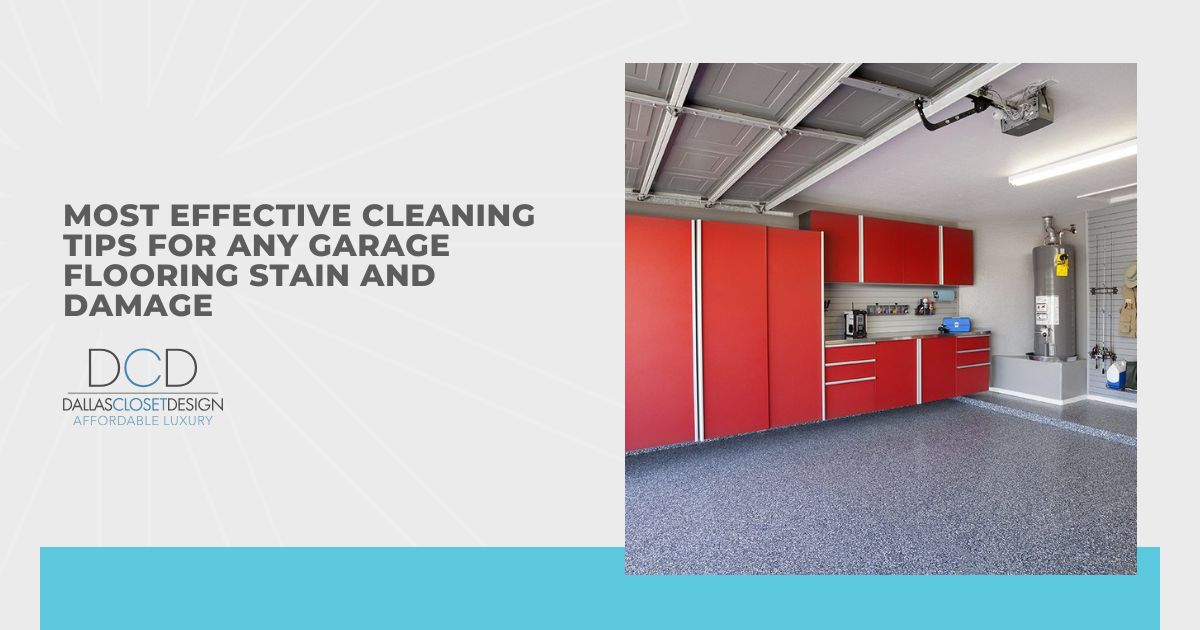
A spotless garage floor isn’t just for show. Garage flooring affects safety (no one wants to slip on a slick oil patch), longevity (unfinished concrete chips faster than potato chip crumbs), and peace of mind. When my garage floor looks good, the whole space feels better, and that energy fuels every project I take on out there, whether I’m sanding a bookshelf or helping my kid rebuild a skateboard.
Over the years I’ve battled every spill under the sun: stubborn motor‑oil halos, bright‑orange rust rings, sloppy paint splatters, and those mysterious black tire shadows that seem to appear overnight. I’ve cracked the code on most of them through trial, error, and a few “oops” moments that I’m happy to spare you. Here are some practices that have worked for me:
- Identifying the type of stain or damage on your garage floor
- Best products and tools to use for garage floor cleaning
- Step‑by‑step methods to remove each type of stain
- How to handle cracks and surface damage effectively
- Tips to prevent future stains and damage
Curious how to decode stains, pick the right cleaner, and keep damage from coming back? Let me show you what to do and what to avoid.
Identifying the Type of Stain or Damage on Your Garage Floor
I’ve learned the hard way that guessing at stains wastes time and money. Start by figuring out what you’re up against:
- Oil & Grease: These usually appear near the car, mower, or snowblower. These spots look dark, feel slick, and never dry all the way.
- Rust: Reddish halos that creep out from under shelving legs, tools, or anything left slightly damp for too long. Easy to ignore until it spreads.
- Paint: I’ve dropped everything from primer to polyurethane. You’ll know it by its color (obviously), but it often feathers at the edges or hardens into a shiny bump.
- Tire Marks: Look for arcs, lines, or textured smudges near your usual parking spot. They’re fainter than you think but stubborn as ever.
- Mystery Gunk: This one’s a grab bag. Is it sticky? Could be old caulk. Is it more chalky? That could be fertilizer. What about weirdly waxy substances? Let’s just say I’ve learned not to ask.
As for actual damage, I check the floor with a flashlight a few times a year, especially after messy projects or weather extremes. Here’s what I’m always watching for:
- Hairline cracks that run long but shallow—easy to miss unless you’re looking closely
- Pits act like dirt magnets. These tiny craters drive me nuts.
- Scaling where the concrete looks like it’s peeling or exfoliating
- Lifted coatings—you’ll spot these when epoxy bubbles, flakes, or peels at the edges like old tape.
Knowing your surface (bare concrete, sealed concrete, epoxy, polyaspartic, interlocking tile) helps you choose cleaners that won’t do more harm than good.
Best Products and Tools to Use for Garage Floor Cleaning
From my experience, half the battle is having the right gear within arm’s reach. I keep these on a dedicated shelf by the garage door, ready for whatever mess rolls in:
- Commercial Citrus-Based Degreaser: There are no choking fumes, and it gets the job done if I follow the dilution instructions. Great on oil without wrecking my floor coatings.
- Phosphoric-Acid Rust Remover: It sounds intense, but it cuts through rust fast. I always rinse thoroughly to protect the surrounding concrete.
- Eco-Friendly All-Purpose Cleaner: Mine’s baking soda-based and safe around pets and kids. I use it after most projects just to keep the dust and grime from building up.
- Brushes: I have two I use regularly. One stiff nylon handheld, the other a long-handle deck brush. Between the two, I can hit small stains or clean an entire section without breaking my back.
- Liquid Absorbers: Absorbent pads are perfect for tiny leaks. Kitty litter handles the bigger splashes.
- Wet-Dry Vac: With the squeegee upgrade, this method is more efficient than a mop. It gets rid of dirty water fast after scrubbing, which helps prevent residue from settling again.
- Pressure Washer: A 1,700–2,000 PSI pressure washer lives in the corner. I use it sparingly, only on bare concrete or rugged tile when things get out of hand.
- DIY Kit: My DIY cleaning kit includes baking soda, white vinegar, and a few old microfiber cloths. It all works wonders when I run out of the fancy stuff and need to spot clean on the fly.
Step‑by‑Step Methods to Remove Each Type of Stain
Different stains call for different strategies; here’s how I handle the more common ones, based on what’s worked best in my own garage:
- Oil & Grease: Sprinkle kitty litter or sawdust. Let it sit for an hour, then sweep. Spray citrus degreaser, scrub in circles, let it dwell for five minutes, and rinse with warm water or a gentle pressure‑wash. Repeat light passes instead of one aggressive blast to protect coatings.
- Rust Stains: Douse the spot with white vinegar or lemon juice; the mild acid starts to work immediately. Sprinkle baking soda for extra abrasion, scrub with nylon brush till the orange lifts, then rinse and neutralize with plain water. For stubborn spots, switch to phosphoric‑acid cleaner, but test first on coated floors.
- Paint Spills: For latex, warm water and a plastic scraper usually lift fresh drips. Dried latex softens under rubbing‑alcohol compresses. Oil‑based paint needs mineral spirits applied with a rag; I keep it localized and ventilate well. Then I rinse, mop with gentle soap, and let dry.
- Tire Marks: Spray a degreaser formulated for rubber residue; let it sit but not dry. Agitate with a stiff brush following the tread direction. Rinse with a low‑pressure nozzle, repeat if shadows linger. Pro tip: parking mats cut this problem down significantly.
How to Handle Cracks and Surface Damage Effectively
No matter how clean you keep your garage flooring, wear and tear is inevitable, especially if you actually use the space. I’ve dealt with everything from hairline cracks to full-on flaking concrete, and knowing when to DIY versus calling in a pro has saved me a lot of time, money, and frustration.
- Small Cracks: I’ve found that these cracks may look cosmetic, but if ignored, they tend to grow fast. Clean out dust with a shop‑vac, widen slightly with a masonry chisel for better bond, and fill with concrete crack sealant. Smooth with a putty knife; let cure per instructions.
- Surface Pits: Vacuum debris, pressure‑wash lightly to remove grime, then apply a self‑leveling concrete patch to even it out. Feather the edges so repairs don’t telegraph through paint or epoxy later. I like to follow up with a light sanding once it’s dry to get a uniform feel underfoot.
- Coating Chips: In my experience, catching chips early keeps them from spiderwebbing. Clean the chipped area, sand it lightly, and patch with a manufacturer‑approved touch‑up kit that matches your finish. A heat gun on low can help blend polyurea touch‑ups into the surrounding area.
- Major Spalling: Just call a pro for this situation. I’ve patched sections myself, but widespread damage often means underlying moisture issues best evaluated professionally. When I tried to tackle deeper spalling on my own, I ended up having to redo everything a year later—lesson learned.
Tips to Prevent Future Stains and Damage
Once I got my garage flooring looking good again, I realized how important it was to keep it that way. These habits don’t take much time, but they’ve made a noticeable difference in how the space holds up over time.
- Quality Sealant or Coating: A properly installed epoxy or polyaspartic layer blocks absorption and simplifies future cleanups. I’ve found that even basic spills, from coffee to coolant, wipe up ten times faster with a good coating underneath.
- Routine Sweep & Spot Mop: Five minutes a week keeps grit from acting like sandpaper under tires and boots. I usually sweep while my car’s warming up in the winter. It’s just enough time to stay ahead of the grime.
- Absorbent Mats in “Hot Zones”: Under the car, by the workbench, at the entry door—cheap insurance against drips. I rotate mine out every season and toss them in the wash when needed, which keeps odors and stains from setting in.
- Organized Storage: Closed cabinets for chemicals, labeled bins for tools. Less chaos = fewer accidents, and it’s easier to spot spills before they spread. I’ve also stopped knocking things over while looking for one specific wrench, which has saved my patience more than once.
- Seasonal Inspection: I walk the floor every spring and fall, looking for new stains or cracks before they escalate. It’s also a great excuse to reorganize, purge junk, and plan any touch-ups while the weather’s still garage-friendly.
Conclusion
Garage flooring typically takes more abuse than any other surface in the house, but the right tools and habits keep it looking sharp and working hard. From identifying stains quickly to choosing cleaners that suit your flooring type, small proactive steps spare you costly repairs later. Make cleaning part of the project rhythm, and your garage will stay a safe and inviting place to work (or just hang out with a cold drink) no matter what life (or your latest DIY adventure) spills on it.